Total Pageviews

Wednesday, May 16, 2012

Coconut Lime Delights

Hello Cats and Kittens!

It's been a while, a long while... my most sincere apologies.  The truth is, I have been busy, lazy and generally uncommitted to healthy cooking as of late.  However, I am re-motivated and delighted to be back in action as summer approaches.  Even more inspiring, my father recently told me that he gives out my blog to his friends and colleagues frequently and some of them have noticed nothing new!!!  Yikes!  Wouldn't want to let my biggest fan's fans down, so here we go again!

This little delight is amazing.  It packs a lot of flavor without the calories, gluten or carbs.  I try to stay away from "sugar free" items because I feel cruddy after eating all those chemicals, but I think combining it with coconut milk makes it feel like a comfort food.  I also like these because you can throw them in mason jars or other sealable containers and take them on a hike, to the zoo, camping etc. without spoiling.


Coconut Lime Delights

This recipe makes 4 smallish servings.

INGREDIENTS
2 packages of 4oz sugar-free gelatin (this pic & nutri-info is for Albertson's brand*)
1/2 cup Boiling Water
1 can light Coconut Milk (look for it in the "Asian Section")
Whipped Cream for topping

METHOD
(1) Boil water
(2) Mix gelatin with water
(3) Stir in coconut milk
(4) Pour into desired serving dishes (I LOVE mason jars!)
(5) Chill for 1-2 hours or until mixture is set
(6) Top with whipped cream if desired

STATS
Per Serving: 83 calories; 6g fat; 3g carbs; 2g protein

* "REAL" Jell-O has less calories and carbs -- but I couldn't find lime at my local grocery store.

Thursday, September 1, 2011

BBQ Turkey Sandwiches

BBQ Turkey Sandwich & Coleslaw: under 300 calorie meal!!!! YUM!


The best thing about slow cooker recipes is that they make your house smell amazing.  The second best thing is how completely mindless they are to make!  What makes this recipe different from your typical throw in the pot and leave for five hours recipe is the tangy and sweetness of this BBQ recipe is NOT accompanied by additives or excessive sugar.  It also is loaded with vegetables that have added vitamins and anti-oxitants and pretty darn low in fat for a BBQ sandwich!

It's great served on a whole wheat sandwich topped with cheese (as shown) and served with coleslaw.  A lower carb option is to add it to a salad, bake it inside a bell pepper as a filling or throw it inside a whole-wheat low carb wrap with lettuce and other veggies.  Because this serves 14... it is also a great candidate to freeze and warm up on a lazy day.  Can you tell I am love with the versatility of this dish!!!?  

INGREDIENTS
Turkey Breast (2 lbs)
Sweet Onion, chopped (3/4 to 1 cup)
Zucchini, chopped (1 large)
Mushrooms, sliced (2 cups)
Celery, chopped (4 to 5 large stalks)
Water (1 cup)
Reduced Sugar Ketchup (1 cup)
Sugar Free Maple Syrup (1/2 cup)
Apple Cider Vinegar (1/2 cup)
Red Wine, any kind (1/4 cup)
Yellow Mustard (3 tbsp.)
Worcestershire Sauce (2 tbsp.)
Garlic, chopped or powder (1-2 tbsp.)
BBQ Seasoning* (1 tbsp.)
Salt & Pepper (to taste)
Corn Starch (1 tablespoon)
Whole Wheat Dinner Rolls
2% Shredded Cheddar Cheese, to top sandwiches (aprox. 1 cup)

* I like McCormick's Smokehouse Maple because I can pronounce all of the ingredients, none of them appear to cause cancer, and it doesn't add calories or fat to the meal.

METHOD

(1) Chop / slice all vegetables and put in slow cooker

(2) Add turkey breast and all other ingredients EXCEPT corn starch, rolls & cheese

(3) Cook on high for 3-4 hours and check.  When turkey is cooked through, take two forks and shred.

(4)  Thoroughly stir, taste, and adjust salt, pepper, syrup & BBQ seasoning; cook for another 1 hour or until it thickens to your liking.

(4) Add cornstarch if the mixture is not as thick enough by the time you want to serve.  But, if you let it cook long enough it will naturally cook down to the right consistency.  

(5) Serve however you like your BBQ!  My suggestion is to toast whole wheat dinner rolls, top with BBQ mixture and sprinkle cheese on top.  Delicious!

STATS
Serving: One BBQ sandwich with cheese
Serves: 14
Cals: 243
Fat: 8g
Carbs: 24g
Protein: 19g
Iron: 10%
Calcium: 8%

Wednesday, August 31, 2011

Sweet Basil Cheesecake

Okay, okay... this is a bit of a misnomer.  There is cheese and it is cooked like a cheesecake, but, other than that, there isn't really anything about it that tastes like cheesecake.  However, it is a perfect combination of sweet and savory and at a recent dinner party, it disappeared in moments, which is always a good recommendation!  AND - it is super-duper easy. Don't be scared if you think you "can't" make cheesecake.  You can. You will. And this is a great place to start because it's an appetizer so no one will judge you that much anyway, right?

Sweet Basil Cheesecake

This recipe makes two large or six small 'cheesecakes'.  It can be made ahead and saved for special events in the fridge for 3-4 days or in the freezer for as long as you like.  Just make sure to bring to room temperature before serving.

INGREDIENTS
Ricotta Cheese, skim or reduced fat (1 cup)
1/3 Fat Cream Cheese (1 cup/8oz/1 bar)
Goat Cheese, soft (1 cup/8oz)
Basil, chopped (1 cup)
Eggs, whole (2)
Eggs, yolk (1)
Splenda (1 or 2 tbsp.)
Sea Salt (to taste and for garnish)
Olive Oil (to garnish)
Veggies or Crackers (to serve with)

METHOD
(1) Spray spring-form, tartlets or pie plate with cooking spray and pre-heat oven to 350F

(2) Add all ingredients (EXCEPT BASIL) into food processor and blend until smooth.

(3) Add chopped basil to food processor and pulse until finely chopped and incorporated evenly.

Wrap Pan in Foil to Keep out Water

(4) Wrap pan(s) with foil and place in baking dishes (of any kind).  Fill dish with hot/boiling water up to the halfway point of the cheesecake pan.  This helps the cheesecakes cook without drying out.

(4) Spoon mixture into cooking receptacle(s).  BE CAREFUL OF THE HOT WATER IN THE BAKING DISH - IT WILL BURN YOU.  It sure as heck burned me!

 pan is 1/2 emerged in hot water

(5) Bake in dish w/water until edges become golden and start to pull away from edge of pan (small = 30 mins; large = 50 mins)

(6) When edges are golden and middle is still jiggly, turn off heat in oven and open oven door.  Let the cheesecakes rest inside the oven (small = 30 mins; large = 50 mins)


bake until edges are golden and then let rest in oven

(7) Remove pan(s) from baking dish and allow to cool and then chill in fridge, aprox. 2-4 hours.

(8) Serve cheesecakes with a sprinkle of sea salt and olive oil drizzled on top along with vegetables and/or crackers (my favorite is zucchini coins! SO GOOD!).

*Want a super deluxe appetizer?  Serve this with roasted red peppers to scoop up with cheesecake and veggies/crackers.
Beautiful, Delicious & Light


STATS
With vegetables is perfect for a low-cal lunch or snack.  
Serves: 12 (1/2 of small cheesecake)
Cals: 150
Fat: 12g
Carbs: 4g
Protein: 9g
Iron: 3%
Calcium: 10%

Monday, August 29, 2011

Gluten-Free Pizza!

When the moon hits your eye like a big pizza pie... it's.... a stomach ache....  Sound like you?  Worry no more...

Cauliflower Pizza Crust!


Cut the gluten (and thereby carbs) and inject an incredible amount of calcium and protein.  I want to be clear, this is not "diet food".  This is mouth-watering, dynamite, and is a crowd pleaser regardless of whether you need/want a gluten-free meal.  In fact, I actually do eat gluten and don't consider this to be a "substitute" but rather a unique recipe.  It is just awesome and quite frankly, way easier than making pizza dough.

Finished Pizza! Delicious!
INGREDIENTS:
***These proportions make 1 pizza
Cauliflower, fresh (1 cup)
2% Mozzarella (1 cup)
Egg (1) or Egg Substitute (1/4 cup)
Fennel
Garlic
Italian Seasoning (or just basil and oregano...)
Pizza Sauce
Pizza Toppings


METHOD:

Riced Cauliflower
(1) Put cauliflower in food processor and obliterate until it is rice sized or just smaller


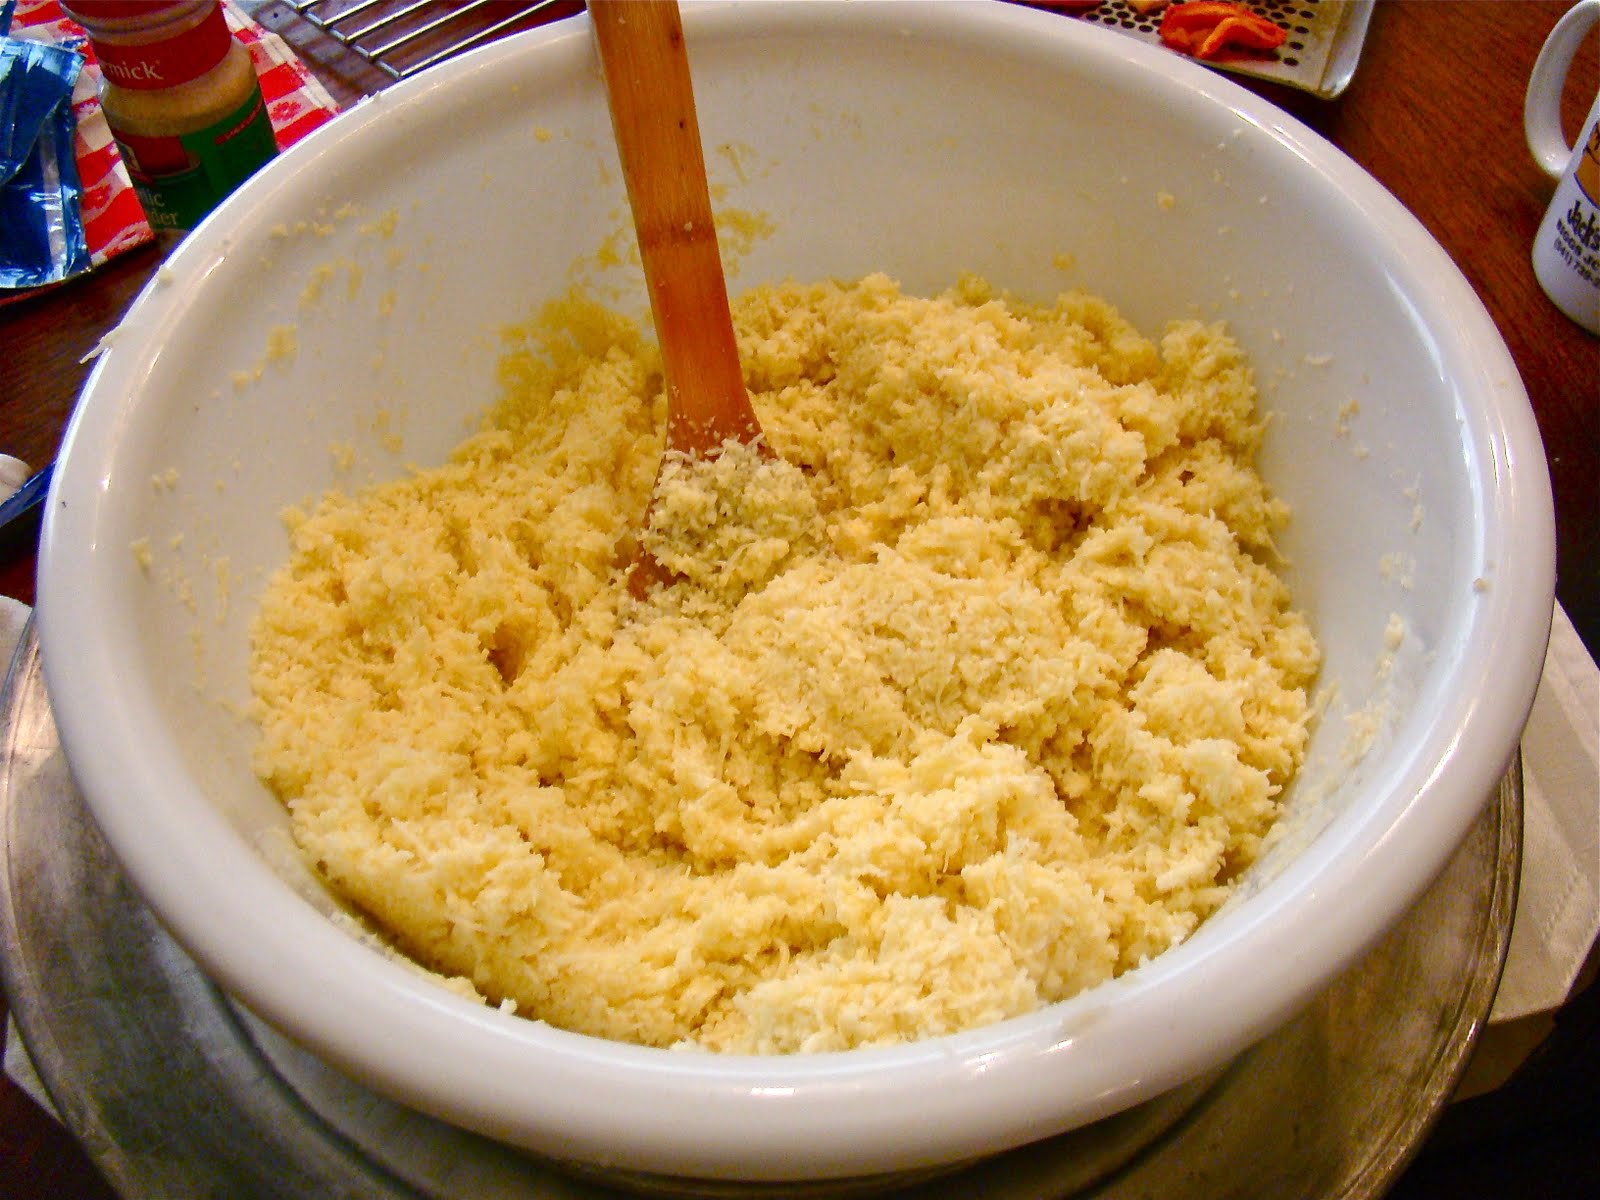
(2) In a large bowl, mix cauliflower with mozzarella.  Add egg or egg sub. and mix until a moist and thick mixture.


cauliflower, cheese & egg


the "dough"


(3) Spray a pizza pan (or baking sheet if you don't have one) with cooking spray. Or, cook on top of parchment paper so the pizza doesn't stick. DO NOT forget this step!!!!

spoon crust onto greesed pan

sprinkle with seasoning

(4) Spoon "cauli-rella" mixture onto pan and spread evenly throughout. Try to keep the crust under 1/2''. The more thin you can spread the mixture the crispier the pizza will be.


(5) Sprinkle fennel, garlic and italian seasoning all over crust


(6) Bake at 425F for 15-20 minutes.


browning edges


(7) When the pizza appears crispy and starts to slightly lift off of pan, take out of oven and let sit for ten minutes.  This is very difficult to burn, but easy to under cook, so when in doubt, keep it in a little longer.


(8) Add sauce, toppings and cheese to suit your crowd.  See suggestions below!
add sauce, cheese & toppings

(9) Bake at 400F until toppings are warm and cheese is melted.

(10) Slice and enjoy!*

* If you put a lot of sauce or a lot of toppings (like I do) then you may have to utilize a fork for consumption.

SUGGESTED COMBINATIONS:
Victory Garden
I like red sauce and mozzarella with vegetarian toppings such as peppers, olives, sweet onions, mushrooms, artichokes, tomato, spinach and any other plant you can think of, and of course, fresh basil.

Victory Garden


Mediterranean
Pesto sauce (homemade & low-cal is best...) with kalamata olives, roasted red peppers, sweet onions, mushrooms and artichokes.  I like this with some mozzarella and then after the final cooking.. sprinkle on some reduced-fat feta cheese crumbles.
Mediterranean


Turkey Pepperoni 
Add Turkey Pepperoni to any pizza for extra protein and minimal extra calories & fat.

Margarita
Perfect yet simple: sprinkle crust with extra virgin olive oil before you add sauce and then top with fresh basil, crushed garlic, thinly sliced tomatoes and mozzarella and then sprinkle with parmesan after final baking.

STATS:
*These are approximate/average for the Victory Garden and Mediterranean*
Per Slice
Cals: 137
Fat: 8
Carbs: 7
Protein: 12g
Iron: 2%
Calcium: 62%

Sunday, August 28, 2011

Faux Phở Bò (Vietnamese beef noodle soup)

One of the reasons Vietnamese cuisine is ridiculously enticing is that the modern version was largely designed to appeal to both native Vietnamese as well as French taste.  As such, sometime after the turn of the 20th century, Phở Bò, or a rice noodle (Vietnamese) and beef (French) soup was born.  My take is actually a faux version of this amazing soup because it is made with tofu noodles that are far less caloric than rice noodles.  So I guess one could describe it as a turn of the 21st century trying-to-be-less-chubby American version.  At any rate, it is easy to make at home and perfectly healthy.  What I really like is that it has a wonderful citrus flavor that is light and refreshing which makes it ideal for hot summer days.  I actually prefer it without the beef... but I prefer almost everything without meat! But, it is a great option for leftover roast.

Phở Bò

To add a little giddy'up to this meal - serve it with Chicken Salad Wontons.

INGREDIENTS
Chicken Broth (4 cups)
Water (1 cup)
Shirataki Noodles (16 oz)
Mushrooms, sliced (1 cup)
Fresh Basil, chopped (1/2 cup)
Cilantro, chopped (1/2 cup)
Green Onion (4 stalks)
Lime Juice (1 fresh lime)
Honey (1 tbsp.)
Garlic Powder (2 tsp.)
Salt & Pepper
Bean Sprouts (1.5 cups)
Beef, thinly sliced (12 oz)
Garlic Chili Sauce (to serve with soup)
Lime Wedges (4 - to serve with soup)

METHOD
(1) Prepare noodles.  Drain and rinse twice. Dry noodles by pressing paper towels or a kitchen towel (more sustainable, of course) on noodles until as much of the moisture as possible is absorbed.  It is vital you get these squishy guys really rung out.

(2) Bring chicken broth, water to a boil.  Add garlic powder, honey, mushrooms and noodles.

(3) Boil until mushrooms start to get tender and then turn down to medium.

(4) Chop and add basil, cilantro, lime juice, green onions and salt/pepper to taste.  Soft boil for about 5 minutes.

(5) Turn to low until you are ready to serve.  when you are ready to serve, toss in bean sprouts and let them cook only until they are slightly soft (less than five minutes).

(6) Adding the Beef: if you are using raw beef, you can throw the thinly sliced pieces in at this point, or, you can do the traditional method and pour the steaming soup over the raw pieces in each bowl.  This cooks the beef medium-rare.  You can also use leftover or pre-cooked beef and add the pieces at any point.

(7) Serve with garlic chili sauce and lime wedges for individual seasoning.

STATS
Serves: 4
Cals: 207
Fat: 7g
Carbs: 14g
Protein: 23g
Iron: 20%
Calcium: 18%


Friday, August 26, 2011

Salmon Noodle Oodles


This is so simple it's criminal.  I adapted this from a Hungry Girl episode I recently watched on the Food Network.  My mother approved (that is huge) and friends have exclaimed how amazing it is because it is a five minute meal that is perfect for a pre-workout meal, especially softball games, because it is light yet packed with protein.  If you have trouble filling up on low-cal meals, try this one, because it is a serious amount of food for 162 calories.... Enjoy!!!

INGREDIENTS
Mushrooms, sliced (1 cup)
98% Fat Free Cream of Celery Soup (1 can)
Shirataki Noodles, drained and dried (8oz package)
Salmon, drained (1 pouch/can aprox. 5-6oz)
Green Onions, chopped (2 stalks)
Garlic Powder
Salt & Pepper

METHOD

(1) Cover skillet with cooking spray and add mushrooms.  Sprinkle with garlic powder and saute on high until mushrooms are tender.

(2) Turn heat down to medium.  Add cream of mushroom soup and stir with mushrooms.

(3) Drain, rinse and thoroughly dry noodles.  Take paper towels and press over noodles to completely absorb all of the moisture that they have retained.

(4) Add noodles to skillet.  Salt & Pepper to taste.

(5) Drain salmon and add to skillet on top of noodles.  Let sit for a few moments while chopping green onions.

(6) Stir altogether and turn heat up to medium-high and cook until hot, serve into bowls and top with green onions and course black peer and then dig in!


STATS
Serves: 2
Cals: 162
Fat: 6g
Carbs: 19g
Protein: 13g
Iron: 4%
Calcium: 13%

Thursday, August 25, 2011

Chicken Salad Wontons

These may in fact be better than egg rolls!!!  And they sure are better for you.  Easy to whip up but not easy to resist...

Chicken Salad Wontons


INGREDIENTS
Wonton Wrappers (40)
Shredded Chicken (1.5 cups)
Broccoli Slaw (4 cups or 1 package)
Mandarin Oranges, drained (1 cup)
Bamboo Shoots, drained (5oz can)
Low Sodium Soy Sauce (3 tbsp.)
Orange Juice (1/4 cup)
Sesame Oil (2 tsp.)
Rice Vinegar (1/2 cup)
Ginger Puree (1 tbsp.)
Garlic Powder (1 tbsp.)
Red Pepper Flakes (1 tsp.)
Splenda Brown Sugar Blend (1 tsp.)


METHOD
(1) Place one wonton wrapper into a mini muffin tins and press down to create a cup.  Spray with cooking spray and lightly sprinkle with garlic.  Bake on 400F until they crisp and start to turn brown on the tips (about 10 minutes).  Remove from oven but do not remove from tray until cups cool.

(2) Finely chops bamboo shoots and mandarin oranges.

(3) In a large bowl, combine shredded chicken, broccoli slaw, mandarin oranges and bamboo shoots.

(4) In a salad dressing shaker (or a small bowl), combine soy sauce, orange juice, rice vinegar, ginger, garlic, red pepper and splenda.  Shake or mix until smooth.

(5) Stir dressing into salad until evenly distributed.

(6) Spoon mixture into wonton cups and serve!

This recipe is best if served fairly soon after making.  They will last as an appetizer through a party, however, they will get soggy on the bottom if you them TOO far in advance.

I also like to eat the filling as a salad.  It's healthy and delicious!

STATS
Per Wonton
Serves: 40
Calories: 36
Fat: 0.4g
Carbs: 5g
Protein: 2.5g
Iron: 1.5%
Calcium: 0.7%

Just as Chicken Salad (not in wonton shell)
Serves: 4
Calories: 180
Carbs: 12.5g
Fat: 3.25g
Protein: 20g
Iron: 11%
Calcium: 7%